Did you know that keeping the bathroom humidity level around 50% is recommended? Otherwise, mould can grow, which can cause various types of health issues, including respiratory issues. However, rapid moisture removal from the bathroom by the bathroom exhaust fan can keep the humidity level below 50%, which is excellent.
To keep your bathroom humidity at the recommended level, you need to clean your bathroom exhaust fan regularly. To clean your bathroom exhaust fan DIY, you can follow the steps below.
- Switch off the power connection
- Dust the fan cover
- Remove and clean the fan cover
- Clean the fan blade and motor
- Reassemble the fan.
In this guide, we will describe how to clean a bathroom exhaust fan in detail. Alongside, we will explain why you should clean your bathroom exhaust fan, and when and why you need professional cleaning.
Why Cleaning the Bathroom Exhaust Fan Is a Must– The Risks
If you want to deny the cleaning of your bathroom exhaust fan, you should know the risks of denying it. When you let the dust and debris accumulate on the bathroom exhaust fan, you will face the following risks.
Mould and Mildew Growth
When a bathroom exhaust fan is clogged due to a thick layer of dust, it can’t remove the bathroom’s moisture properly. As a result, it creates an ideal environment for mould and mildew.
Mould can cause respiratory infections, nasal congestion, sneezing, eye irritation, skin rashes, eczema, and other fungal infections.
Mould can also cause chronic asthma and allergy. 40% of Aussies are inherently allergic.
So, you should not allow the humidity level of your bathroom to be over 60%, which ultimately causes the growth of fungi.
On the other hand, keeping your bathroom exhaust fan clean ensures no fungal growth and saves you, your family, and your staff in the office from any health issues related to mould by improving indoor air quality.
Fire Hazards
Dust buildup in your bathroom exhaust fan can lead to overheating. Overheating causes fire hazards at the same time, which puts your life at risk.
According to the Renton Regional Fire Authority in the USA, bathroom exhaust fan is a common cause of household fires.
Keeping your bathroom exhaust fan clean ensures fire safety and saves you from any unwanted fire accidents.
Increased Energy Costs
When a fan is clogged due to dust, it needs to work harder. The pressure is increased, and ultimately, this increases power consumption. When you clean your bathroom exhaust fans regularly, they stay clean, and keep the energy consumption as expected.
Shorter Fan Lifespan
All the strain when a fan is full of dust and clogged pushes the fan to work harder. It goes through more friction and ultimately wears and tears fast. So, you will get a shorter lifespan for your bathroom exhaust fan due to not regularly cleaning it.
But, oppositely, Regular maintenance can extend the fan’s lifespan by years, saving you money on replacements.
Signs of a Dirty Exhaust Fan
When your bathroom exhaust fans get dirty, they will show some signs. If you notice any of the following issues, it is time to clean your bathroom exhaust fans.
- Getting weak airflow despite the fan being on. This indicates that the dust is reducing fan efficiency.
- You will notice increased bathroom moisture, which will ultimately help to grow mould. You will also notice mould buildup around the fan areas.
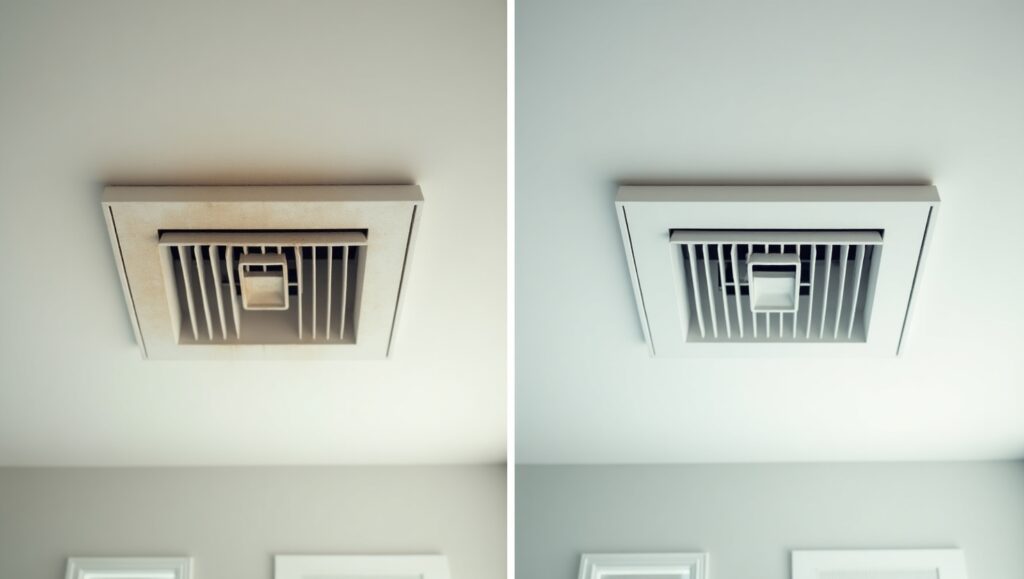
- Dust builds up around the fan cover/ air vent.
- You will notice strange sounds from the fan or excessive heat generated by the fan. This is one of the biggest fan motor maintenance concerns.
Essential Tools to Clean a Bathroom Exhaust Fan
Before getting started with your bathroom exhaust fan cleaning, you should gather the right tools. The following tools for fan cleaning are essential and make the process smooth.
- Screwdriver: To remove the vent cover and access the fan.
- Soft brush, tooth brush, vacuum, or air blower: For removing dust buildup inside the fan housing.
- Microfiber cloth: For wiping down fan blades and motor.
- Mild detergent or vinegar solution: For cleaning vent cover and the surrounding areas.
- Gloves and dust masks: To protect yourself from dust and debris.
How to Clean a Bathroom Exhaust Fan With 5 Easy Steps
Well, now let’s get to the point. We will discuss 5 easy exhaust fan cleaning steps to clean your bathroom exhaust fan.
Below are the steps discussed in great detail.
Step 1- Take Safety Precautions Before Cleaning
Before you start cleaning, it is a must that you ensure the following safety precautions.
- Turn off the power: Switch off the fan switch to avoid electric shocks. For extra safety, we recommend switching off the circuit breaker.
- Wear Protective gear: Wear a dust mask and gloves. The dust mask will protect you from allergens and debris that come from the fan.
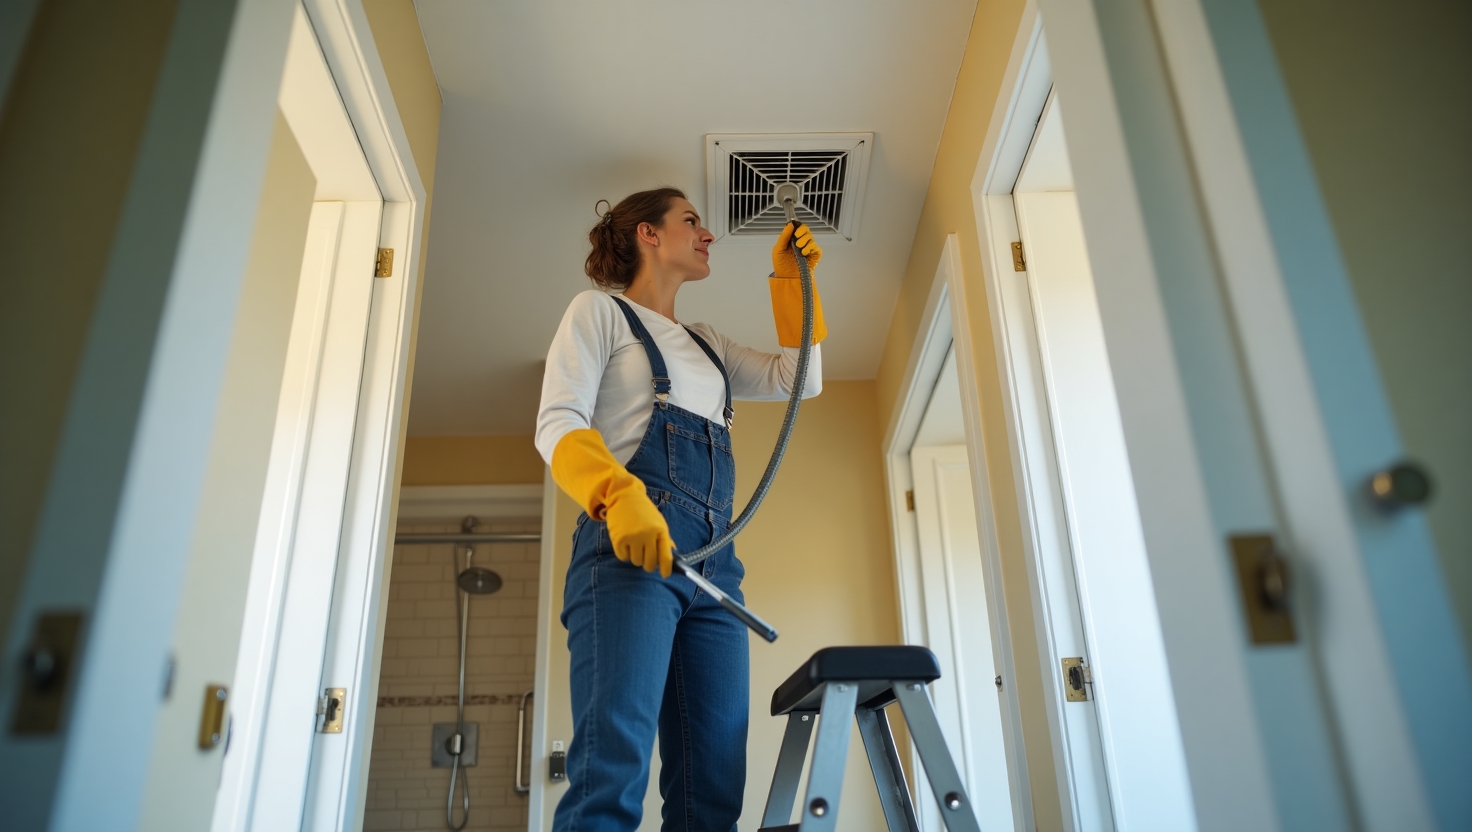
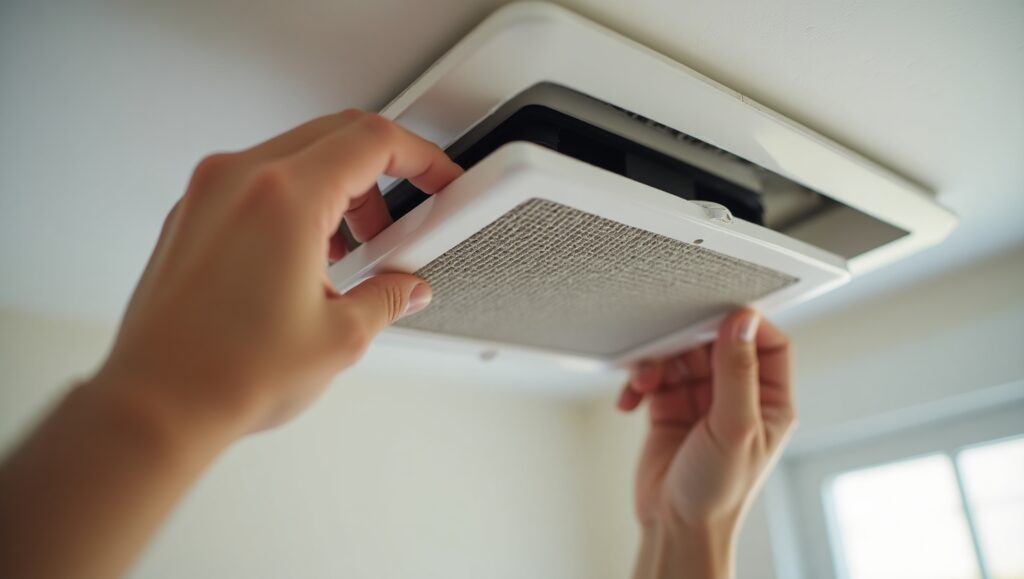
Step 2- Remove and Clean the Vent Cover
Removing the fan’s vent cover is straightforward.
- Simply pull off the cover and squeeze the mounting wire/metal clips. The cover will be released.
- Some covers use screws instead of mounting wire. For them, simply use the screwdriver to remove the screws and pull off for cleaning vent cover.
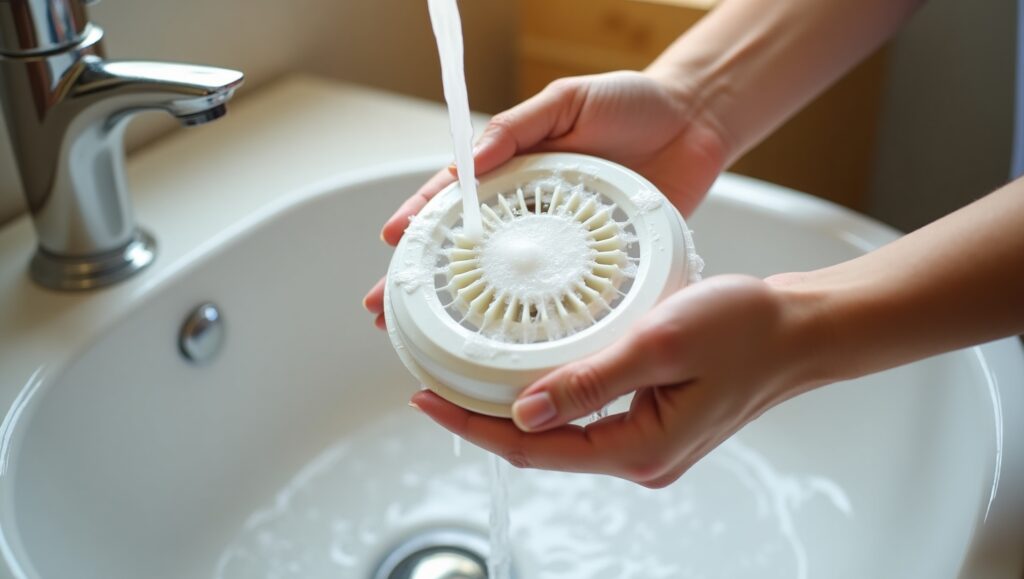
- If the cover is heavily covered with dust, use a soft brush or toothbrush to remove the dust. Otherwise, use a dry and clean microfibre cloth to remove the dust.
- Now, mix mild soap/dish soap with warm water and submerge the cover in the mixed solution. Scrub the vent cover in every inch with a toothbrush for a deep clean.
- Or, you can use a vinegar solution to submerge the cover and use the brush.
- After cleaning the vent cover, rinse it with clean water and air dry the fan cover.
If you happen to have a vent cover with a light, then:
- First, disconnect the wire from the fan’s body.
- Don’t submerge the cover in water.
- Simply vacuum it off or use an air blower to remove the dust.
- Afterward, use a soft brush to clean the remaining dust.
- Use a clean, damp microfibre cloth to scrub and rinse the cover.
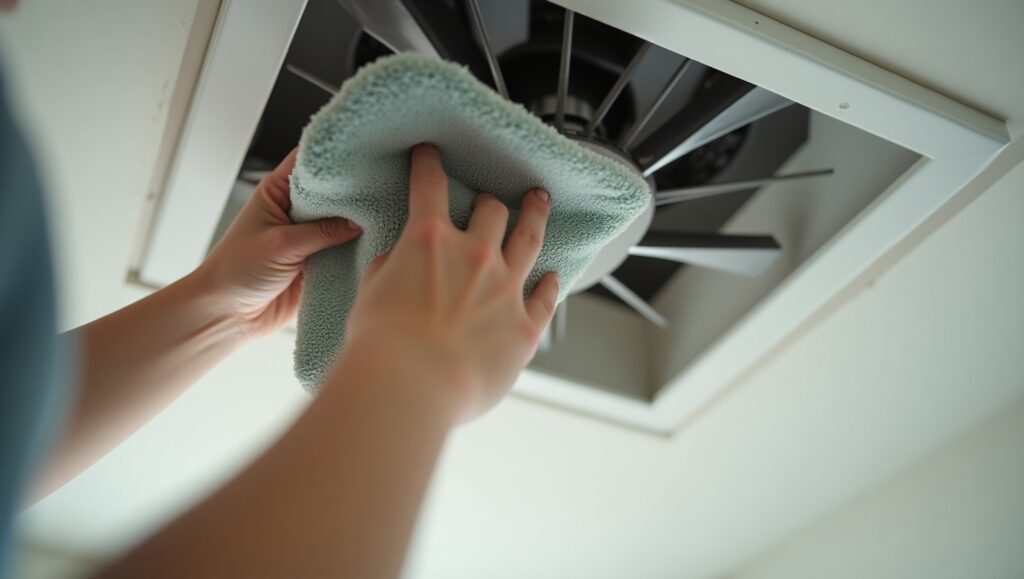
Step 3- Clean the Fan Blade and Motor
- Use a vacuum cleaner with a crevice attachment to remove dust buildup from the fan blades and housing.
- Then switch to a brush attachment for cleaning the fan housing and all fan components.
- Maintain a light touch on the fan blade and motor so that you don’t damage any fan components.
- Alongside, use a toothbrush to remove the loose dust particles from the fan body.
- After, you can use an air blower to remove any remaining dust from the hard-to-reach corners.
- After completing the cleaning with the vacuum and blower, now take a clean, damp cloth and wipe the fan blades and surroundings gently.
Step 4- Remove the Fan for Deep Clean
If you think your bathroom exhaust fan needs a deep clean, don’t hesitate to remove the fan from the ceiling.
- Removing the fan is easy– just remove 2-4 screws.
- Some fans are also installed without screws. Simply pop up the fan, and it will be removed.
- Before that, disconnect the fan connector wire from the wire housing.
- For deep cleaning, use compressed air, an air blower, or a vacuum with a brush attachment. Then, remove the loose dirt with a brush.
- Wipe off the remaining dust and dirt with a soft, damp microfibre cloth.
- Also, clean the fan holding place on the ceiling.
- Make sure the motor doesn’t get wet.
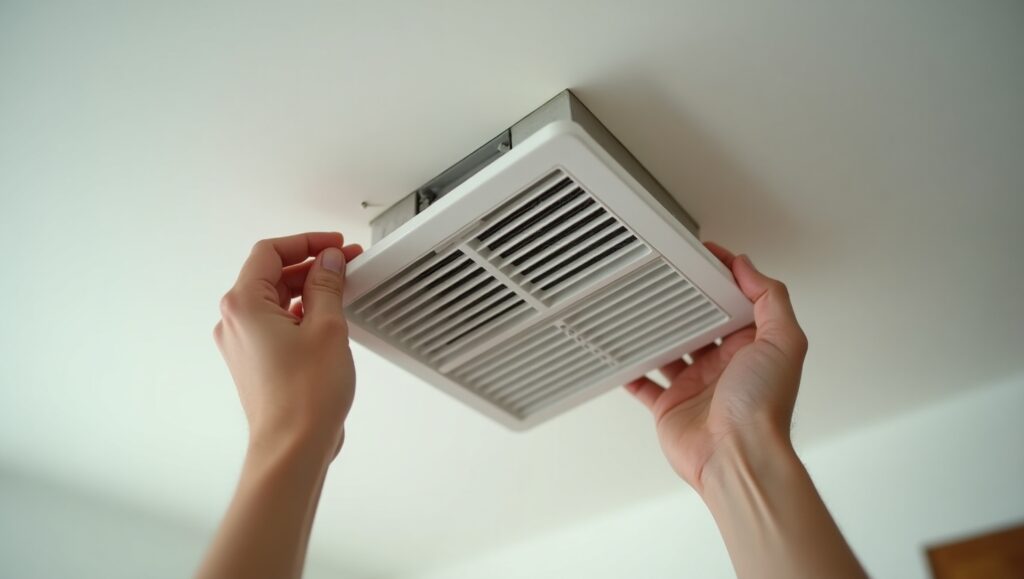
Step 5- Reinstall the Fan and the Cover, and Test the Fan
After thoroughly cleaning your bathroom exhaust fan, it’s time to reinstall it.
- Ensure all parts are dried before starting installation.
- Put back the fan and tighten the screws.
- Or, simply put the fan on the fan-holding space and push it to set on the place if the fan isn’t installed with screws.
- Put back the vent cover and push it up/install the screws.
- After completing the reinstallation, switch on the circuit breaker and check if the fan runs smoothly.
Tips for Maintaining a Clean Bathroom Exhaust Fan
Here are some effective tips you can follow for regular bathroom ventilation maintenance.
Recommended Cleaning Schedule
How often should you clean your bathroom exhaust fan? Well, here is a breakdown.
- Light dusting: For regular basic maintenance to prevent buildup, you should dust lightly once a month.
- Deep cleaning: You should ensure deep cleaning for your bathroom exhaust fans every six months for best performance.
- Professional inspection: If you use your bathroom exhaust fan frequently, you should hire professionals for inspection and professional cleaning once a year.
Additional Tips for Preventing Dust and Mould Build-Up
- Run your exhaust fan for at least 15–20 minutes after a shower to prevent excess moisture.
- Consider installing a humidity sensor switch to activate the fan when needed automatically.
- Keep your bathroom door slightly open while the fan is on for better airflow.
- Consider upgrading to an energy-efficient model if your fan is old or inefficient.
When to Call Professional Cleaning Services
Sometimes, DIY maintenance isn’t enough. When you can’t handle all the following bathroom exhaust fan cleaning issues, you should call for professional cleaning services.
- If your fan still makes noise or struggles after cleaning and basic bathroom fan troubleshooting.
- If there is excessive mould growth around the fan housing.
- If the motor is overheating or not working properly.
- If you’re uncomfortable handling electrical components.
Professional cleaning ensures deep cleaning, motor checks, and overall system efficiency. Experts recommend professional cleaning at least once every 1–2 years for optimal performance.
Final Words
Regular bathroom ventilation maintenance is key to keeping your home fresh, dry, and free from mold. By knowing how to clean a bathroom exhaust fan, you’ll improve indoor air quality, extend fan lifespan, and prevent moisture damage.
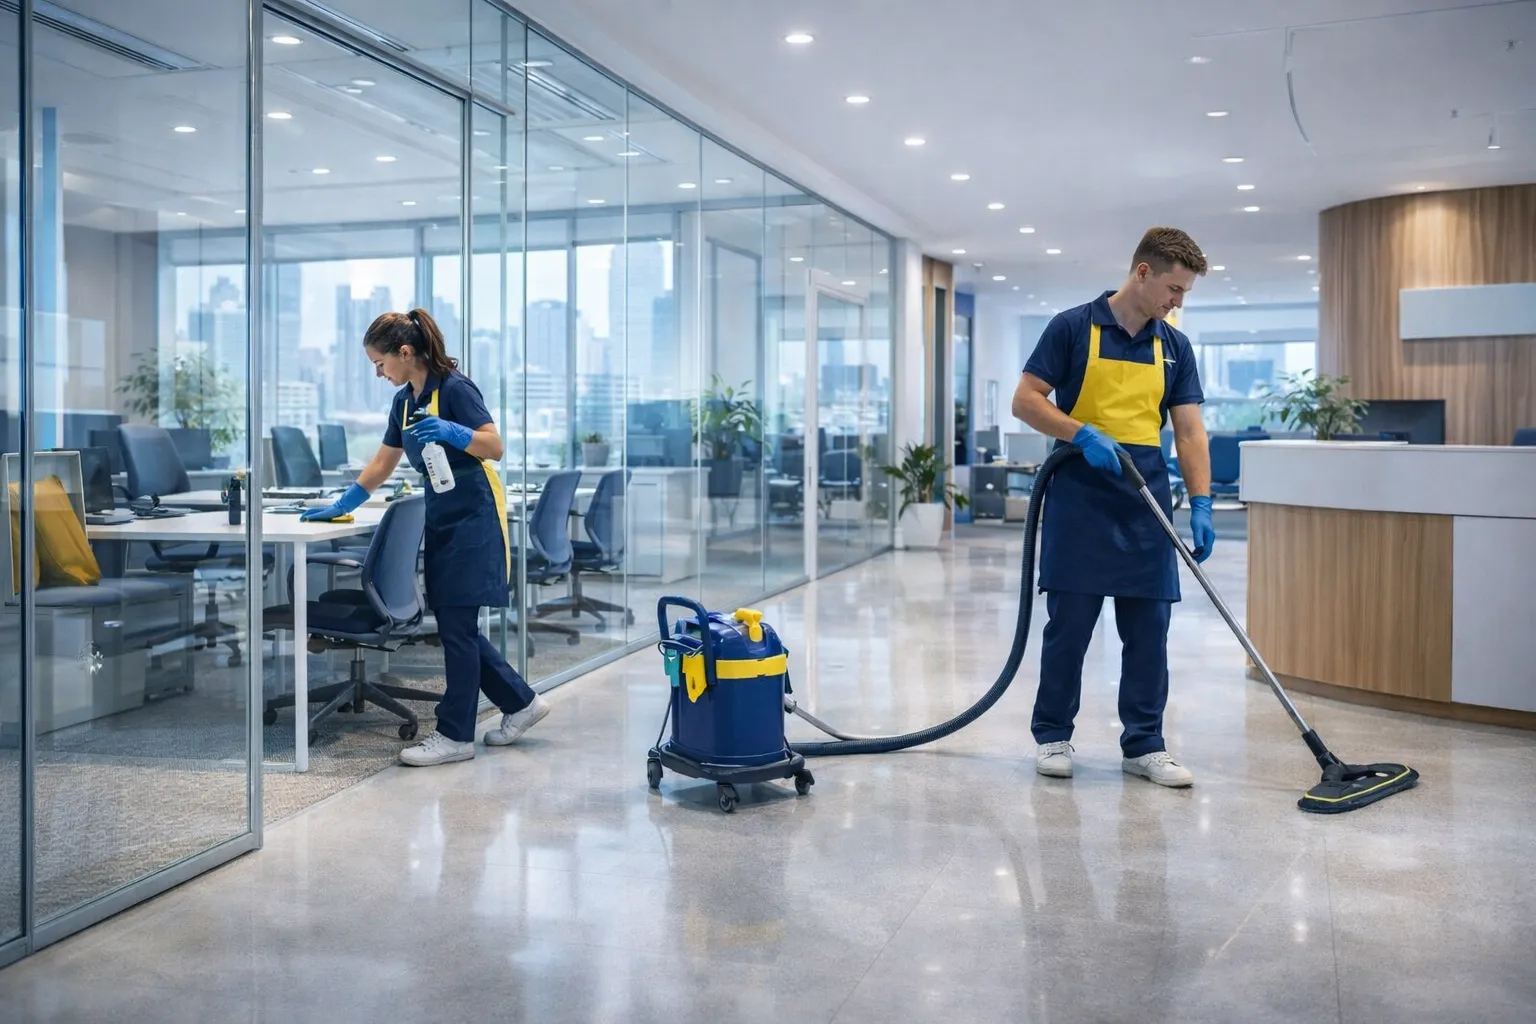
If you need expert help, Eco Cleaning Brisbane has over 20 years of experience serving across Brisbane. Contact us at +61 7 3189 2759 or email info@ecobrisbane.com.au for professional cleaning services. We will take care of your bathroom exhaust fan for the most efficient level of ventilation.